Photo Gallery Elements
How to create Photo Gallery elements.
Overview
Photo Galleries are good ways of grouping and showing a set of related images. There are 3 Photo Gallery layouts to choose from.
Full Photo Gallery Layout
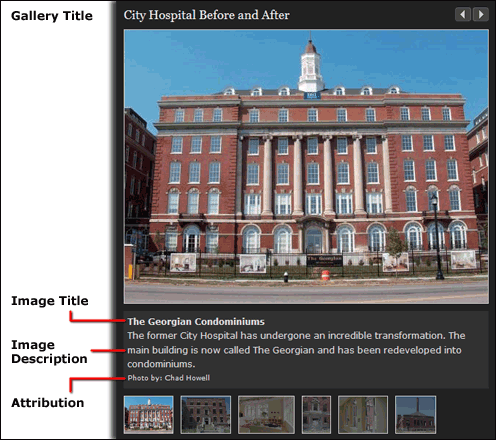
The following image is an example of a Photo Gallery element using the Full Layout.

Medium Photo Gallery Layout
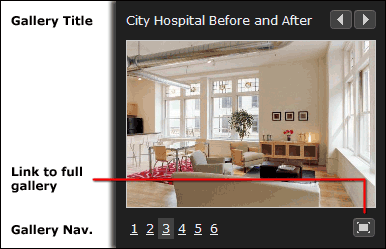
The following is an example of a Photo Gallery using the medium layout. This is good for 50% layouts, and has a link to the original full gallery page.

Small Photo Gallery Layout
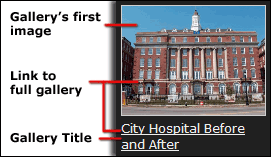
The follwing is an example of a Photo Gallery using the small Layout. This is good for 33% layouts, and links to the original full gallery page.

Step 1: Upload the Images
Images should be 500px wide. There is no restriction on height at this time. We recommend that you resize them before uploading them to CommonSpot. If you don't have an image editor capable of doing this, try using https://www.photopea.com/.
Each Photo Gallery can have a maximum of 12 images. You can have as few as one if you like.
Step 2: Create the Gallery Page
We recommend creating a page for each photo gallery in your organization's Media folder. This allows you to easily find and update the orignal gallery later, even if it has been reused on different parts of the site. This also becomes important if you choose to use one of the smaller views on your content page, and want to link to the full-size gallery.
- Navigate to your department's Media folder.
- Create a new page.
-
- Don't forget to tag it with the "Gallery Pages" content type!
Step 3: Fill Out the Photo Gallery Element
- Insert a Photo Gallery element on the page. This is in the CIN section.
- Define the Photo Gallery element:
- Title is the Photo Gallery's title.
- Description is the Photo Gallery's description.
- Date is the date you want associated with the gallery.
- 01 Image is the gallery's first image.
- 01 Image Source is the person/organization that owns the image (if applicable).
- 01 Caption is the first image's caption.
- 01 Image Title is the first image's title.
- 01 Contact Data an email address or URL for getting in touch with the image's owner (if applicable).
- Sections d - h are repeated for each image, up to 12.
- Click Finish
Step 4: Review and Submit the Element
- Check your content for accuracy.
- Submit the element & activate the page.
Optional: Embed on Other Pages
Now that you have your Photo Gallery element, you might want to embed it on other pages. Check out the tutorial on reusing elements for more information.
The great thing about reusing elements is no matter how many pages you reuse them on, you only have to make changes to the original and they'll all be changed at once!
Help Us Improve This Page
Did you notice an error? Is there information that you expected to find on this page, but didn't? Let us know below, and we'll work on it.
Feedback is anonymous.