Single Image Element
Inserting the Single Image Element
Step 1: Go Into Author Mode
- Log in to CommonSpot.
- Click on the pencil icon in the top-right corner of the page.
- Select Work on this Page.
- If someone else is already in author mode for that page, you will see a box pop up saying that the page is locked by another user.
Step 2: Insert the Single Image Element

- Choose the container that you want the Single Image element to be in.
- Click Insert new element at the bottom of the container.
- In the Element Gallery, click on Image Elements.
- Click on Single Image (without header).
Step 3: Define the Single Image Element
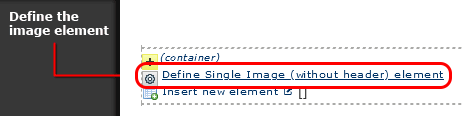
- The Single Image element is now inside your container.
- Click Define Single Image (without header) element at the bottom of your container.
Image
If you have already uploaded your image, press Choose. Otherwise, press New and upload your image.
- You now need to search for your image in the Image Gallery.
- Enter your search terms (image title or keyword).
- Choose a Subsite to search in (if you aren't sure, choose "/" and check "include child subsites" to search the whole site).
- Once you have made your filtering decisions, press Search.
- Browse through the results, and click on the image you want to use.
- Click Use Highlighted Image.
Image Size
We recommend that you resize the image before uploading it. But here you can resize the image and give it padding.
- Press Edit.
- Original Size: Displays the image at the size it was when it was uploaded.
- Custom/Advanced: Resizes the image based the height and width you provide (in pixels).
- Scale Proportionally: Enter a width OR height, not both. The other number will be calculated automatically. Use pixels, not percent.
- Border tab: Here you can give your image a border and padding.
- Border: Enter a number in pixels. Please keep the color black.
- Padding: Enter a number in pixels to give your image vertical (top and bottom) or horizontal (left and right) padding.
- Press Save to submit your changes.
Alternate Image Text (Flyover Text)
Alternate image text is printed in place of your image for people with visual disabilities who are using screen readers.
- Enter a brief description of the image.
Link
- If you would like to make this image a link, press Edit.
- To link to a page within our site, or an external page, select Link to Existing Page, Uploaded Document or URL.
- Press Next.
- If this is a CommonSpot page, select CommonSpot Page, Uploaded Document or External URL and press Page Gallery.
-
- Choose the subsite the page you want to link to resides in.
- If you don't see the page you are looking for, change the Category to All Categories.
- Click Update Results.
- Click on the page you want to link to.
- Press OK.
- If this is an external page, select External URL or Relative Internal URL.
-
- Paste in the full URL to the page.
- Press Finish.
Finish Inserting the Image
- When you are satisfied with your choice, press Save.
Step 4: Publish Your Changes
At this point you have made two changes that need to be published; adding the image element to the container, and defining the image element. Both changes will need to be submitted before the public sees your image.
Feedback is anonymous.