Creating a New Page
Create a new page in CommonSpot
Prerequisites
This tutorial assumes you already know the following:
Overview
Creating a page takes quite a few steps, most of which are focused on making this page easily found by people visiting our website. All of the content on the site is tagged with 'metadata' which allows us to organize it and present users with relevant information.
It's important that you tag each page correctly, so that people looking for information find what they are searching for.
Step 1: Fill Out Page Info

- Click on the New menu in the gray toolbar.
- Click on Page.
- Select the Subsite where the page will reside.
- It defaults to the current subsite.
- Click Next.
- There's only one template available to contributors in the Template Gallery, so you can just click Next.
- Fill out the page's information:
- Name: This is the page's filename, and should be lower case with no special characters. If this page will be the subsite's home page, name it 'index'
- CommonSpot Title: This is the title that will show up in the navigation, so make it descriptive!
- Page Title: This is the title that shows up in the top of the browser window and/or tab. You can make it the same as the CommonSpot title.
- Description: Gives a bit more detail about the current page. These descriptions show up at the page, and in search engine results, and help users decide what result to click on.
- Category: This should be 'Informational Pages.'
- Keywords: Which words might someone type in a search box when looking for this page?
- Publication Date: When do you want this page to go live for public viewing?
- Availability: Most pages will want all of these checked. Not checking the boxes limits the areas where this page will show up.
- Expiration: Do you want the page to go away on a specific date?
- Click Next.
Step 2: Fill Out Custom Properties
Global Properties
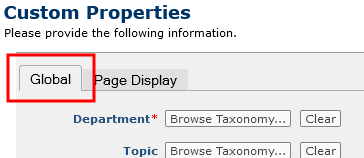
Global properties are important because they make your pages show up in the right place(s).
- Department: Which department is providing the information on this page?
- Topic: Hierarchical list of topics relevant to city and county governments.
- Audience: Does this page best apply to a certain group of people?
- Ward: Does this page best apply to a specific ward or wards?
- Neighborhood: Does this page best apply to a specific neighborhood or neighborhoods?
- Content Type: List of genres of content. Choosing a Content Type
- Click on the Page Display tab at the top of the window when you are satisfied with your choices.
Page Display Properties
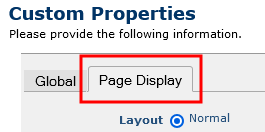
Page Display sets up the page layout.
- Layout:
- Normal is for most pages on the site.
- Department Home Page is for department home pages.
- Home Page is for the home page of the entire site (you won't be needing this one).
- Display Banner: Check this box if you would like a banner image on this page.
- Display page title: Automatically inserts the page title at the top of the page content.
- Left column contents: Do you want to show or hide the organization navigation?
- Left Nav: Shows the left navigation on this page.
- Other Content: For special pages that require a custom navigation.
- Hide Left Column: Doesn't display the organization navigation.
- Containers:
- Each container represents a row on the page, and can be used to create special page layouts.
- 1-column: One column that spans the entire content area.
- 2-column-50-50: Two columns, each using 50% of the content area.
- 2-column-66-33: Two columns, left is 66% and the right is 33% of the content area.
- 2-column-33-66: Two columns, left is 33% and the right is 66% of the content area.
- 3-column: Three columns, each 33% of the content area.
- hidden: The row does not show up (if there is content inside it will not be deleted).
- Display related links section: Displays links to pages in other subsites that share the same topic or audience.
- Click Finish.
Step 3: Add Content and Publish
You should now see your new page, along with the row/column combinations you chose. Since you have not yet published any content the page is not available to the public.
- Add necessary elements to the page containers.
- Publish your changes to make the page live to the public.
Help Us Improve This Page
Did you notice an error? Is there information that you expected to find on this page, but didn't? Let us know below, and we'll work on it.
Feedback is anonymous.