Page Index Element
Display a list of links that is automatically populated based on rules you provide.
Overview
What Are Page Index Elements?
Page Index elements are used to display lists of links based on rules you give it. You can have as many/few rules per page index element as you want.
Some possible uses:
- Creating a list of recently created pages for your department.
- Creating a list of all pages owned by your department for internal use.
- Creating a list of all downloadable forms that have been tagged with a certain keyword.
The uses are certainly not limited to the above.
For a real-life example, if I create a CommonSpot tutorial page and tag it with the keywords "tutorial" and "elements" it will automatically show up in the Elements section without me having to go in an create a link.
What Do They Look Like?
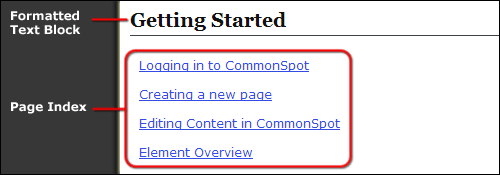
By default, page index elements just display a list of links with no other information:

By changing the element's layout, you can show other things like the page's author, creation date, description, or whether or not it's new.
Here's a the same page index, showing each page's description as well:

We have also created some custom layouts to display even more information for certain types of pages.
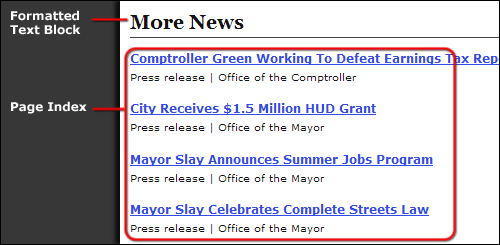
This page index element is using a news layout to show what kind of news item it is, and which department published it:

Insert the Page Index Element
- Decide which container you would like to put the element in.
- Add a new page index element, located at the bottom of the Hyperlink Elements section.
- Define the new page index element.
Some Examples
Since there are so many options to choose from and ways of using page index elements, we thought it best to just show you some step-by-step examples.
Display a List of All Department Pages
It's sometimes useful to have an overview of all pages in your department, grouped by subsite (folder).
Create Your Filter
This filter can be created in both the Standard and Advanced tabs, but assumes you are using Standard.
- Select your department's root subsite from the drop-down menu next to Subsite.
-
- Human Services' root subsite would be "/government/departments/human-services/"
- Make sure Include Child Subsites is checked.
- If you would like to see pages that are set to be published in the future, uncheck Exclude Pages with Publication Date in the Future in the Other section.
- If you would like to see pages that have expired, check the box next to Show Expired Pages.
- Under Categorization, Sorting, & Description Options set the Categorization to Subsite.
- Click OK.
You now have a list of all pages in your department's section of the site, grouped by subsite. Each time a page is added it will show up here.
This is great, but sometimes it's nice to see more detail about each page before clicking on it.
Display Page Descriptions
Let's add page descriptions to each link so we know what each page is for.
- Click on the element's edit icon in the upper-left corner of the element. It is probably yellow at this point.
- Click on the Layout button.
- Click on Title and description.
- Click Finish.
Now the links are much more usable.
Creating a List of Profiles

Create a list of short profiles, each linking back to the full profile page.
Create Your Filter
This filter will be best created in the Advanced tab.
- The first rule gets all pages in your Profiles folder.
-
- Field: Subsite
- Operator: Equals
- Value: Your Profiles folder
- Change the -Select- drop-down menu to be AND to bring up another rule option.
- The second rule returns only "Contact Info and Biographies" pages.
-
- Field: Global.Content Type
- Operator: Equals
- Value: Contact Info and Biographies
- Change the -Select- drop-down menu to be AND to bring up another rule option.
- Optional: The third rule limits profiles to your department/organization (use this if there are profiles from several departments in one folder).
-
- Field: Global.Department
- Operator: Contains
- Value: Your department (click on the little gray circle with lines)
You now have a list of links to your department's profiles, but it would be more useful if it displayed more information for each link.
Apply a Layout
The Profile List layout shows the person's name, title, phone number, and links back to the original profile page for more contact options.
- Select Profile List from the list of available layouts for this element.
-
- Review the Layout tutorial for a refresher
You now have a formatted list of profiles on your page that will be updated automatically when profile elements/pages are changed, added, or deleted.
Show the 3 Latest News Articles for Your Department

Since each news item is created in your News folder, it's relatively easy to pull a list of the news items.
Create Your Filter
This filter will be easier to create in the Advanced Tab.
- The first rule will get all pages in your News folder.
-
- Field: Select Subsite from the drop-down menu.
- Operator: Equals
- Value: Your News folder.
- This will return all pages in this folder, even if they are not news pages (like the index page), so we need to add another rule.
- Change the -Select- drop-down menu to be AND to bring up another rule option.
- This second rule will limit the above results to pages tagged with the News and Announcements category.
-
- Field: Global.Content Type
- Operator: Equals.
- Value: News and Announcements
- We only want the latest 3 news items, so we should sort the results by publication date.
-
- Down near the bottom, under Categorization, Sorting, & Description Options, set Sort Order to Publication (Release) date, Ascending.
- Click OK.
Now you should have a list of each page in your News folder that has been tagged as News and Announcements, sorted by publication date.
This is nice, but the list will be huge after a while because it will keep adding links as you add new pages.
Limit the Results to 3
- Click on the Edit Element icon in the upper-left corner of the element (probably yellow at this point).
- Click on the Layout button.
- Check the box next to Results Limit and limit the results to the first 3 items.
- Click Finish.
Now you have the news 3 news items. If you add a new news page, it will show up at the top of the list automatically.
The list is there, but it's a little boring. Let's liven it up a bit.
Apply a Layout
The News: Department List layout shows the news item's tag line and what kind of news item it is.
- Select News: Department List from the list of available layouts for this element.
-
- Review the Layout tutorial for a refresher
You now have a formatted list of news items on your page that will be updated automatically as you add more content to the site. It's a bit of work upfront, but these things will save you lots of time in the long run!